3. Texture Paint a Donut
Previously in Section 2: Modeling a Donut , we modeled a convincing donut shape. However, this donut lacks any color. In this section, we will get started in using the Texture Paint Mode to paint our donut model.Understanding The Basics
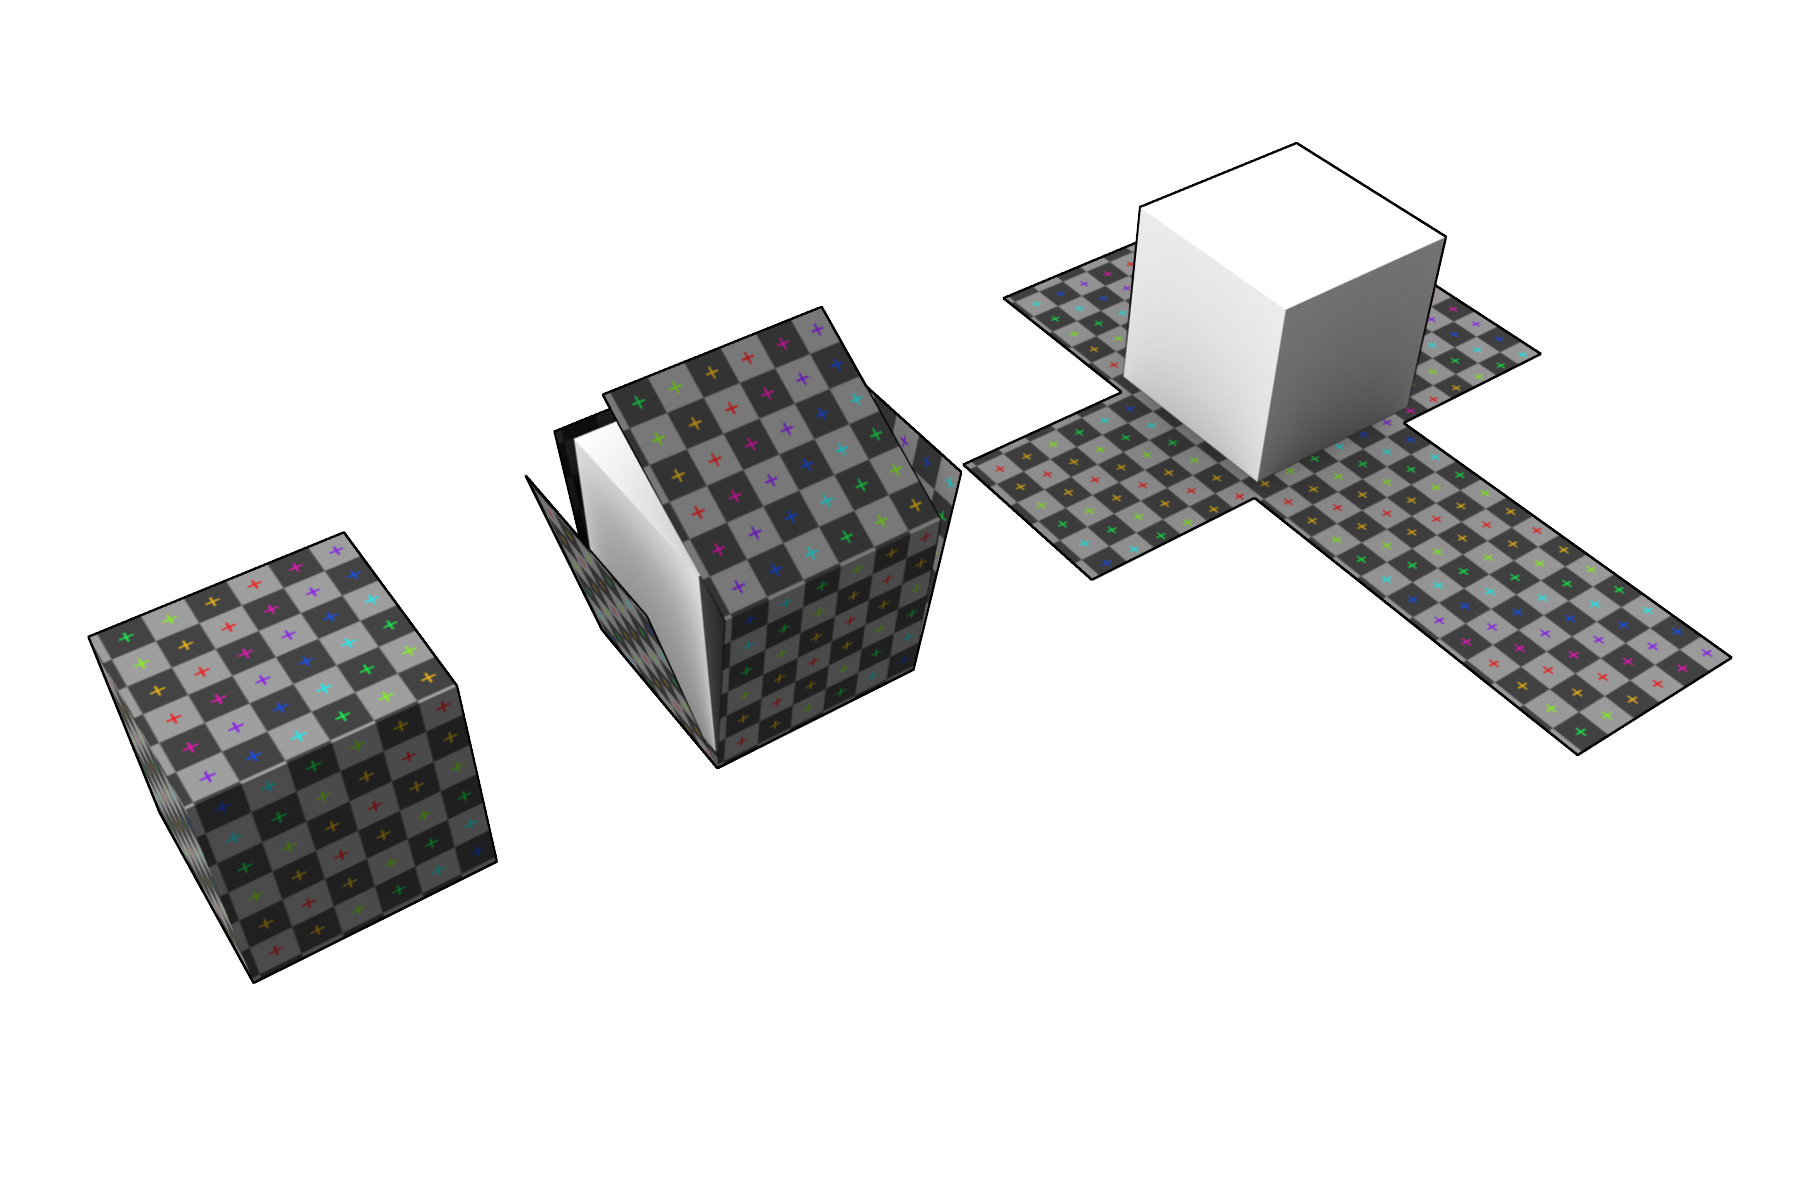
Before starting this section, it is important to understand what UV unwrapping is. In computer graphic, the most convenient way to store color definitions (paintings, sketches, ...) is with 2D texture. However, because our models exists in a 3D space, we need to map each faces of our model such that each faces display the correct portion of a 2D texture. As a visualization:
Unwrapping Our Model
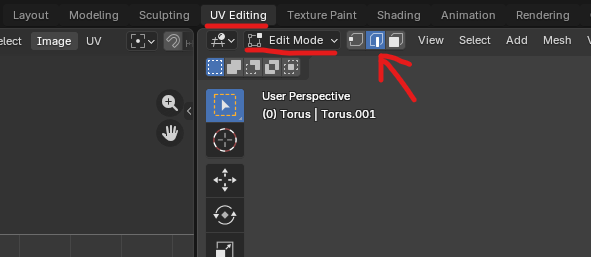
Continuing from the Section 2 project, select the UV Editing tab. Ensure that you are still in Edit Mode. Here we will perform UV unwrap our model so that it is easy for wrapping a 2D texture. We want toswitch to Edge Selection. This allows us to select edges instead of vertices, which was chosen by default.
Essentially, imagining that our model is a paper donut, we want to cut the donut open and straighten it out, such that it can be flattened as a 2D paper as visualized below.
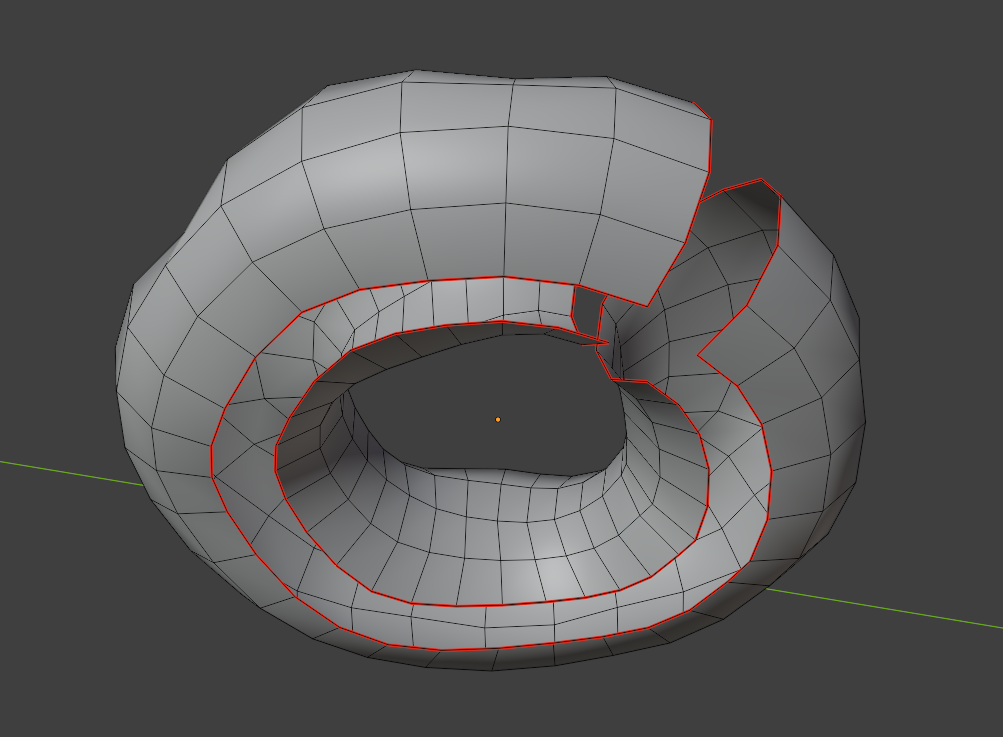
Firstly, pivot the camera to see the bottom of the donut, the hold Alt and select one of the horizontal edge to smart-select a loop. Afterwards, right click and select Mark Seam.
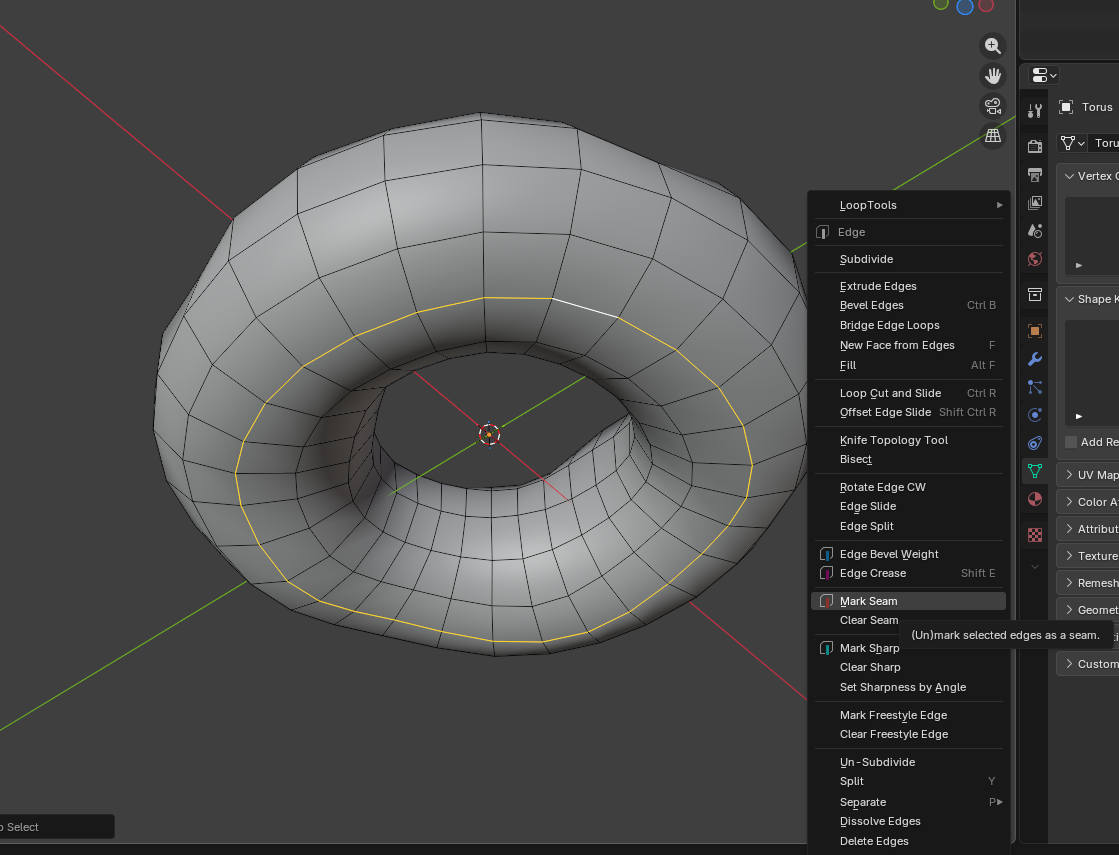
Now perform the same for one of the vertical edge loop. At the end, we should have 2 edge loops marked as red seam.
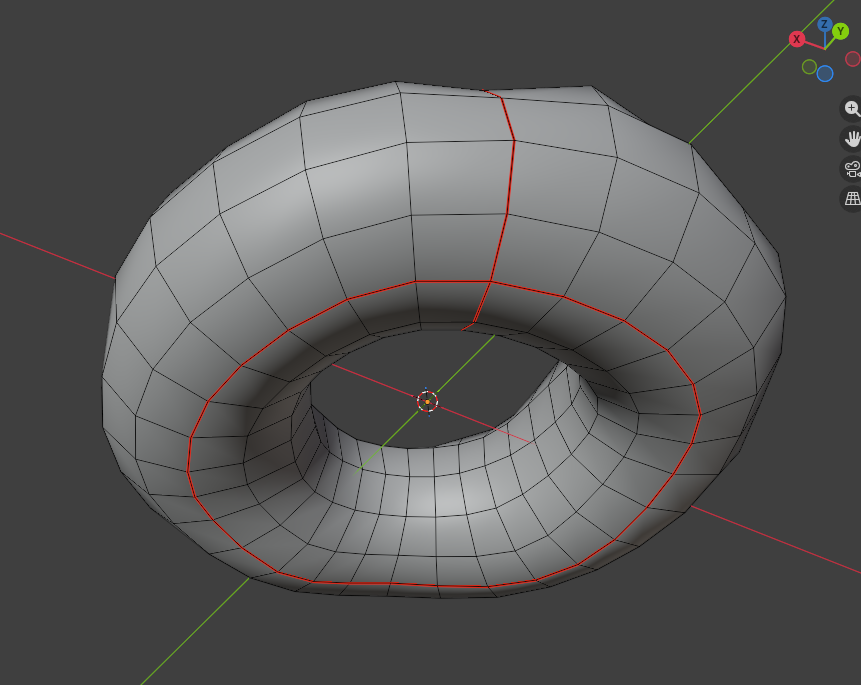
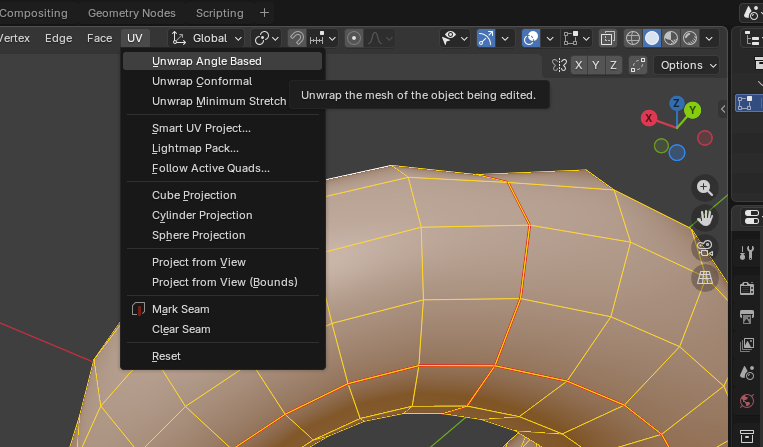
These seam mark tells Blender where to cut our model open and unwrap to a UV map. To unwrap, select all by pressing A, then select UV>UnwrapAngleBased. The mapping on the left tab shows our UV map.
Start Painting
Now that the hard part is out of the way, we can start painting our donut.
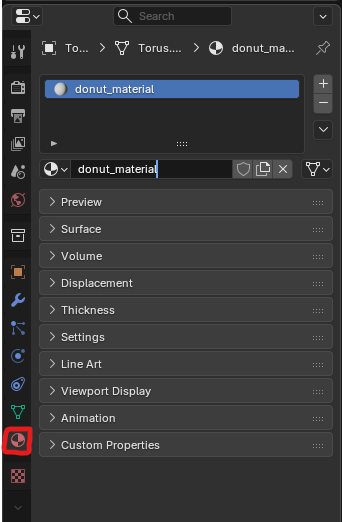
First, create a material for our donut. Go back to the Layout Tab, switch to Object Mode, select the donut and create a new material. Here I name it "donut_material".
Then go to the Texture Paint tab and add a Base Color Texture as shown. Here I name the texture as "donut_color" with size 1024x1024 pixels.

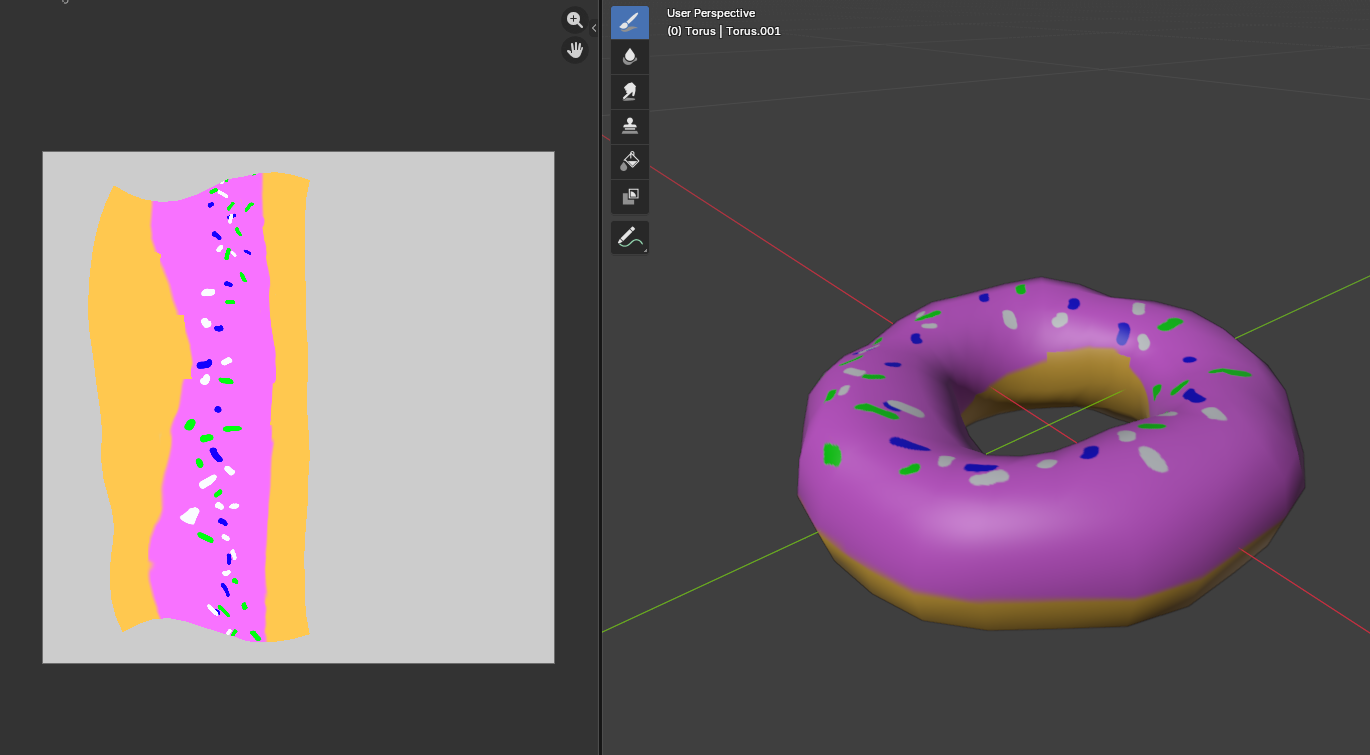
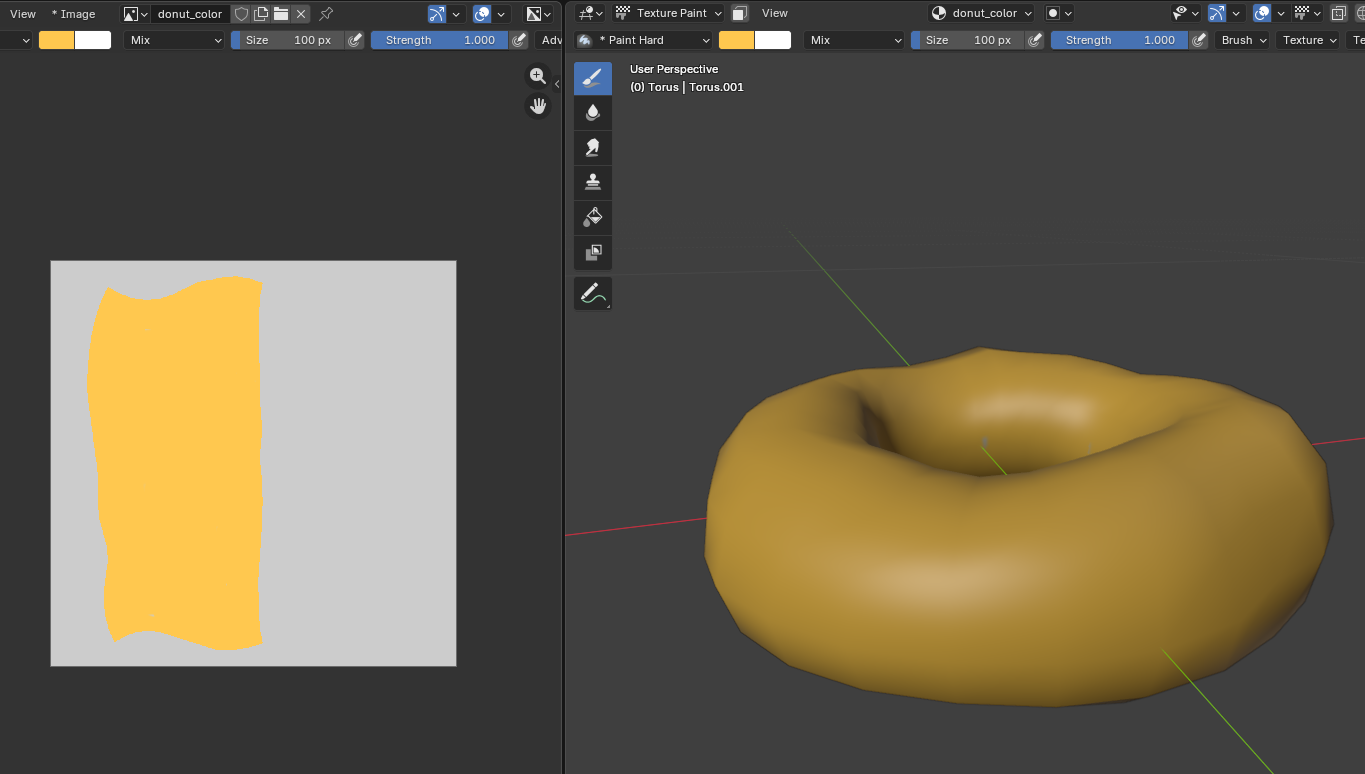
With everything setup, we can now choose colors, brushes and paint our model. Here I paint the base bread color with an orange color. We can see on the left tab that the color does not fill the entire texture, but only the portion corresponding to the UV map.
Play around with your creativity and paint your model. For example, this is my final donut model.